Custom Event Creations

Showing posts with label board and batten. Show all posts

Wednesday, February 1, 2012

Board & Batten Walls in MBR

Hey there!  I linked our master bedroom furniture before & after to Evolution of Style link party yesterday and realized that I never posted about the wall treatment.


before

after


So...here it is FINALLY!  After lots & lots of research I decided that I loved the look of crisp white board & batten wall treatments. 

I used several blogs for inspiration:
 It's the little things that make a house a home
The Yellow Cape Cod     
The Nester

I enlisted my husband to help me with this one.  It was a big project as our bedroom is a good size with an attached sitting room.  We took lots of measurements.  With our notes in hand off to the store we went.  We wanted to keep the costs down and had read that home improvement stores will "rip" the plywood down for you into boards to save us a major step in the process.   Unfortunately, our local Lowes was not able to rip the plywood down for us.  :(

But I was not about to give up so we went a little farther down the highway to Home Depot.  We found a willing employee to help our worthy cause little home improvement project.

As the very kind man in Home Depot continued to cut & stack our boards my dear husband began frantically rechecking our calculations.  Then told him to stop cutting as we had enough boards to cut.  Apparently, we were really "off" on our measurements and had lots of left over wood.

No problem after seeing our completed room our neighbors were inspired to do the same wall treatment in their laundry room and they had all the wood they needed sitting in our garagae...ha ha ha!


We painted the top 1/4 of the walls & the ceiling Benjamin Moore Coventry Gray.


Before we starting hanging the boards in the room.  I sanded & primed all the boards in my garage.  Since we were being cheap Cents-able and using plywood it was pretty rough.


There wasn't much exact measuring involved here.  We were lazy eager and didn't want to waste time with a lot of cutting around outlets and light switches.  We simply lined the boards along each wall  to determine the spacing we needed for each wall.


We used  1/2 inch thick plywood on vertical boards and precut 3/4 inch boards for the horizontal pieces.  We used our nail gun & liquid nails to attach all the boards to the walls. 


Not all the boards lined up perfectly...


..but a little wood putty & caulk will help with that!


 Once all the boards were up.  I was ready to paint and get it done!  But my husband insisted that we caulk all the seams.  What!?!  I asked on both sides of each & every board???  Yup...that's exactly what he meant.   I wanted to just be done at that point but he was right!!!  It made it look so much more finished with the caulking.


Once all the boards were up & caulked I painted with a white semi gloss paint.  And again the final results.  LOVE it!  It was a lot of work but it brightened the room and gave it a lot of character.
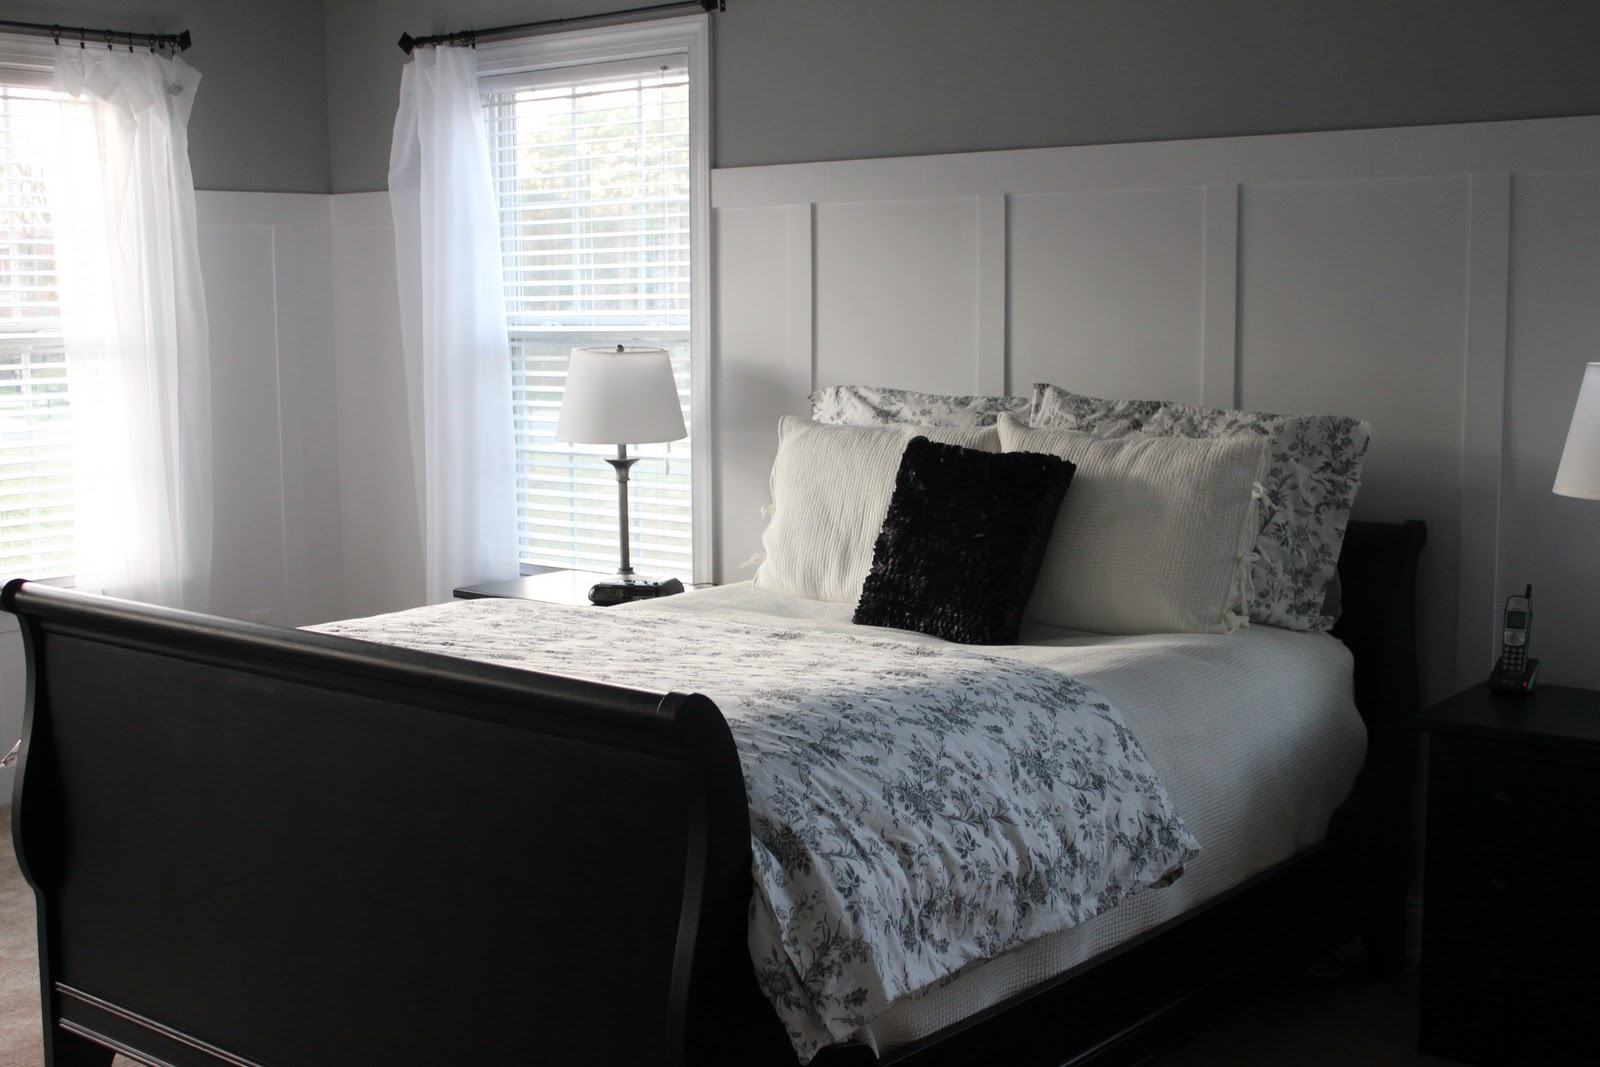
  
Between painting the furniture black & adding the board & batten it feels like a different space!

Monday, March 21, 2011

Master Bedroom

After many months of debating a wall color for our master bedroom I kept coming across pictures of rooms with board and batten which I absolutely LOVE! 
So...I decided to try it out.  Our room is a pretty good size and also has a sitting room.   I thought about skipping the sitting room to save time & just doing the bedroom area but the two spaces open up to each other so we did both.  I don't have any pictures of the sitting area before.  And I'm not quite ready to show the after picture of that space since it has become my staging area (a.k.a dumping place) for decorating the room. 

Anyway...here is our bedroom before...


Not bad but not great either.  We've had the bedding forever!  The furniture is even older!!  And it's got an orange-y (is that a word?) colored finish...yuck! 
 
Let me tell you installing the board and batten wasn't an easy process...if  I knew that before I probably would have tried it in a smaller room for the first time.  But now that it's done I LOVE it and it was SOOOO worth the effort!  


And here is the almost finished room:


I painted the ceiling & top portion of the walls Coventry Gray by Benjamin Moore.  The board & batten is Valspar White in semi-gloss.  As you can see I painted the furniture  (LOVE IT!) but I'll show you that in more detail in another post.  Still need art work for above the bed...thinking 3 framed pictures or a wall quote?


We decided to put the board & batten about 3/4 of the way up the wall.  I'll go into more details of the "how to" in another post...I'm just so excited with the results I wanted to show you the before & after of our room...


I just hung new plain sheer curtains on black metal rods that I already had.  I may add some gray ribbon detailing to the sheers if I feel like getting creative in the future.  But for now these fit the light & airy look I was going for.  And at $5 a panel (I needed 6) they were "cents-able".


I've had the white quilt & shams for at least 5 years...they were a Home Goods bargin.  It's actually off white but I doesn't bother me too much...if I find a true white one for a good deal I may have to get it ;) 
I bought the flowered duvet cover & shams set at Ikea.  A steal at 40 bucks!


My hubby (still trying to figure out what to call him...my first post I used hubs) installed a new ceiling fan for me.  The old one didn't match the new room so we are going to reuse it in his office.  But the new one was a great find at Lowes...only $45 for the fan & the light kit was on sale for $29.   


I'd love new lamps but since I'm already over budget for this project I spray painted the ones I had.  They didn't come out too bad...at least if you don't get too close.   Ha ha!  I got new shades at Ikea for $10 each.  I'd like clear glass lamp bases but we shall see...for now these work.  

Before (actually forgot to take one of the table lamps so here is the matching floor lamp that I haven't painted yet)...


After....


Hope you enjoyed the before & after pictures of this room!  Can't wait to share the details of the installation of the board & batten walls.  Don't you agree...it makes such a difference in a room?  I'm already thinking of more places I can use it.  And I'm also looking forward to sharing the refinishing of that ugly orange-y furniture.  Stay tuned!